[toc]
Most of the time, by using one software or another we are able to resize images, but when it comes to image size, we often find ourselves in a standstill. Here’s how you can resize and edit your images while keeping the file size within a specific maximum limit.
Step-1: Go to the website picresize.com
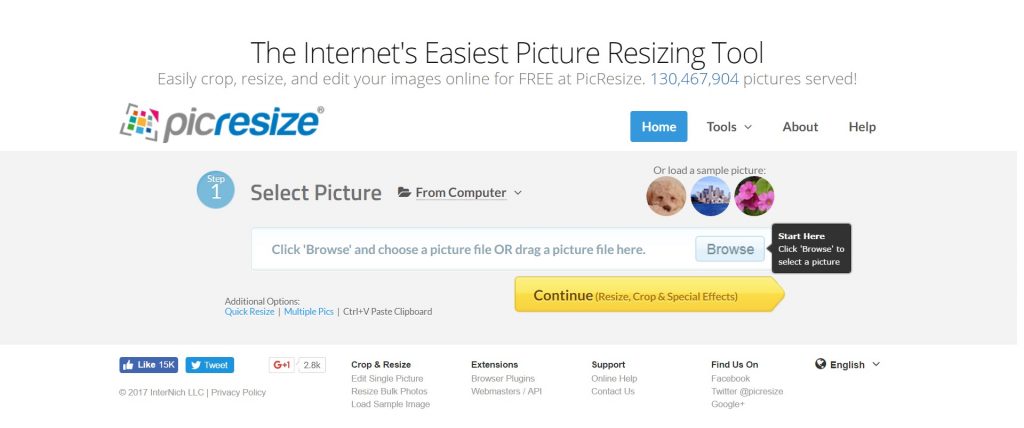
Click on the link http://picresize.com/ to proceed further. You’ll find a welcome page like the one given below.
Step-2: Select the source of the image
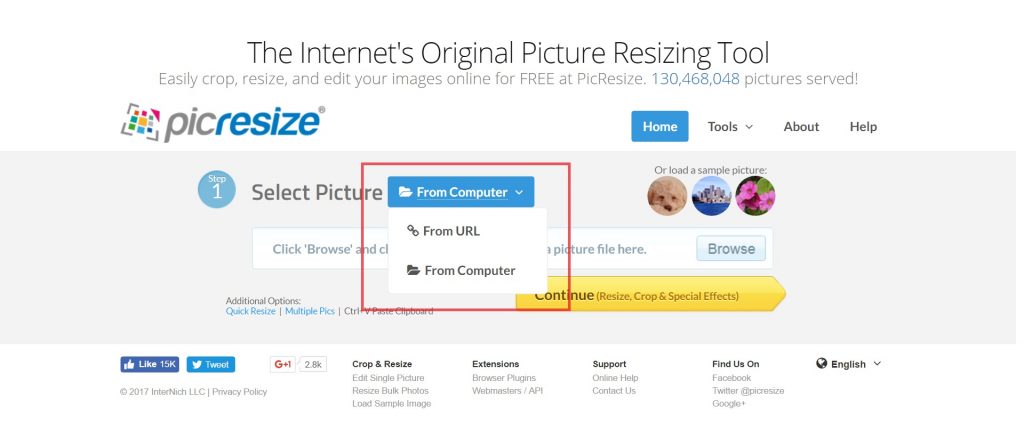
Fill in the source of image, i.e. either from your computer or from a URL by choosing an option from the drop down menu.
Step-3: Upload your image
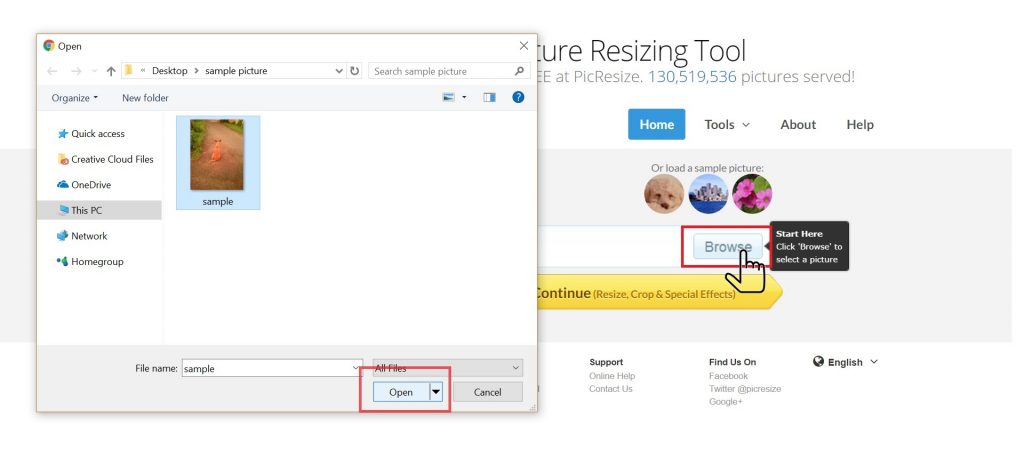
Click on “Browse” to locate your image (if uploading it from your computer) and upload it.
Step-4: Click on Continue
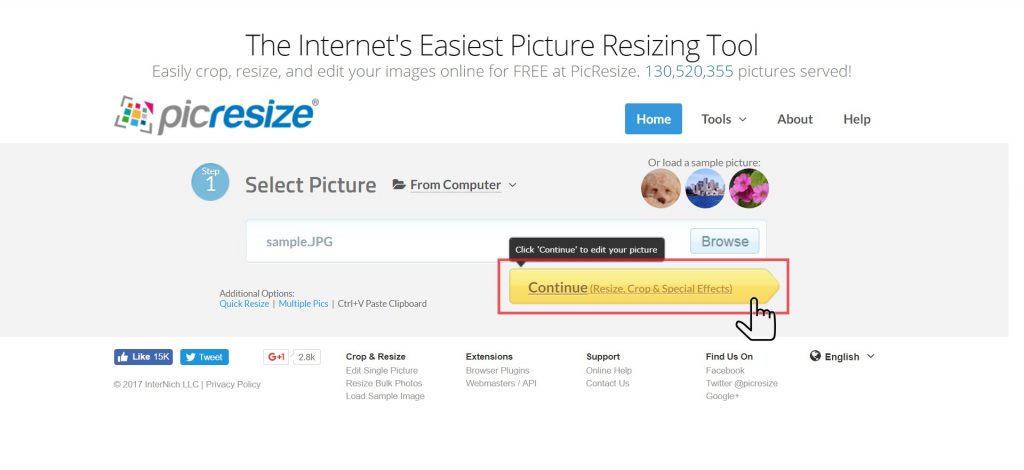
After this, click on “Continue (Resize, Crop & Special Effects)” to start the editing process.
Step-5: Rotate the image
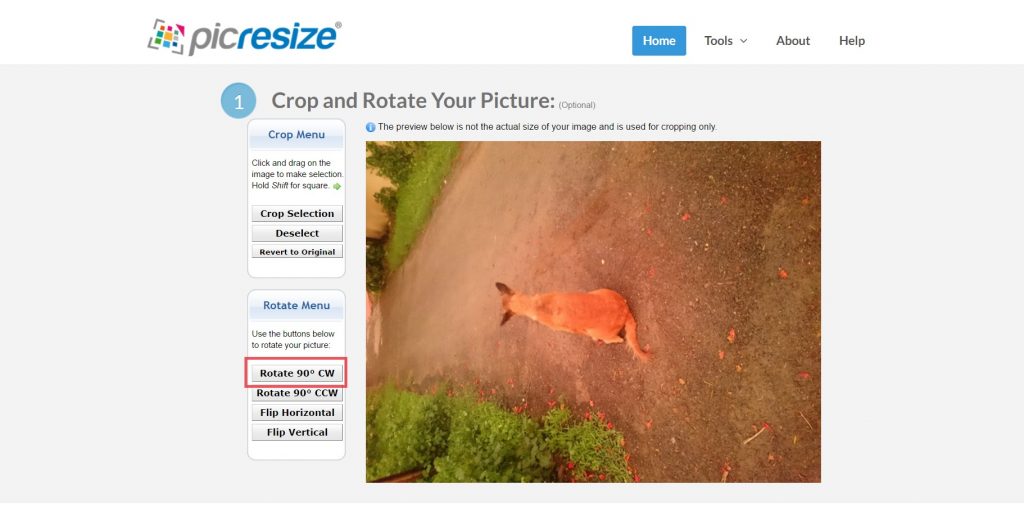
You’ll see that the image is shown on the page along with various editing options around it. In case you need to rotate the image, go to “Rotate Menu” and click on the desired option.
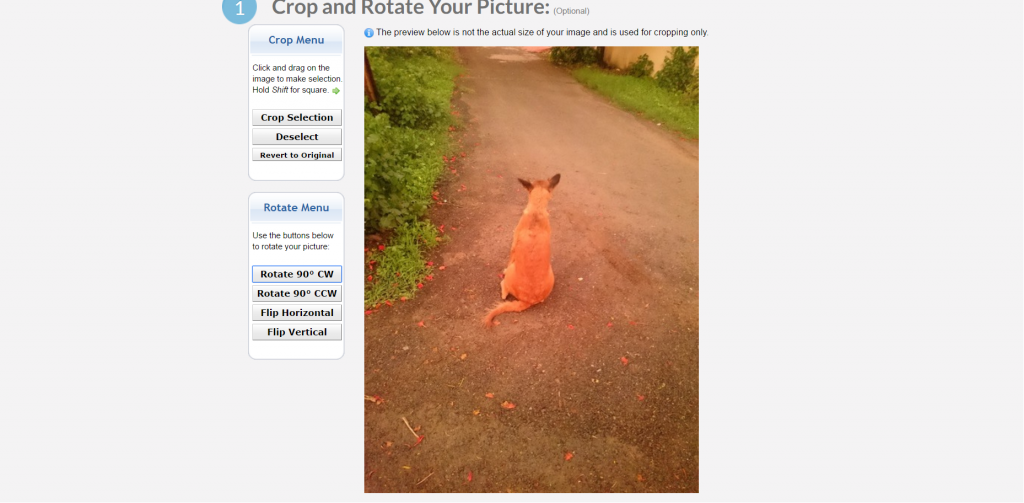
For e.g. the image shown below needs to be rotated 90 degree clockwise (CW) and so “Rotate 90°” was selected.
Step-6: Crop it
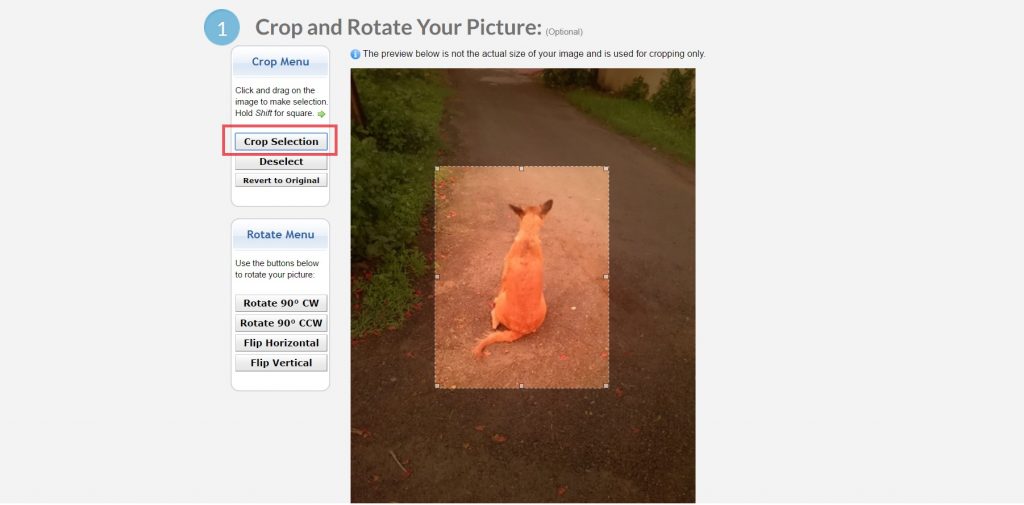
You can also crop the image by selecting the desired portion by clicking and dragging your mouse directly over it. If you want the cropped portion to be in square shape, do the same process while pressing the ‘Shift’ key on your keyboard.
Step-7: Resize as needed
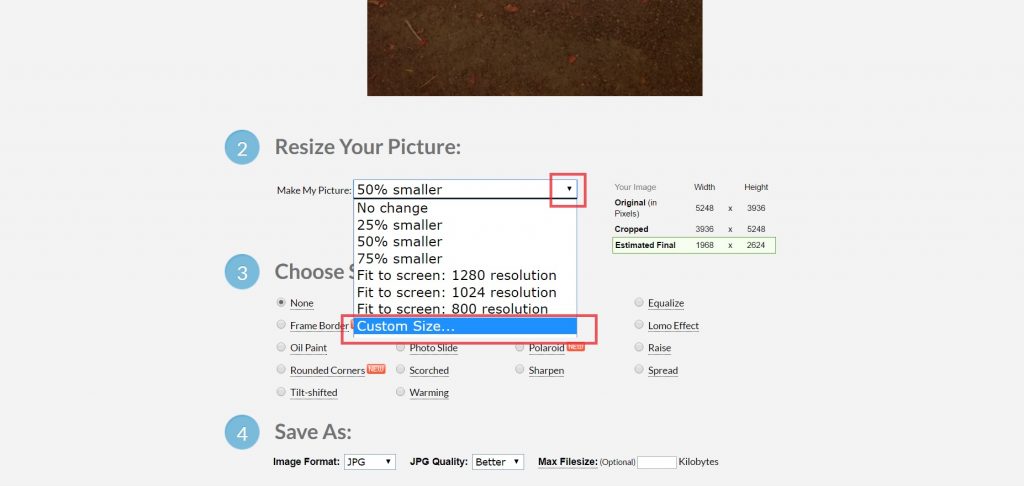
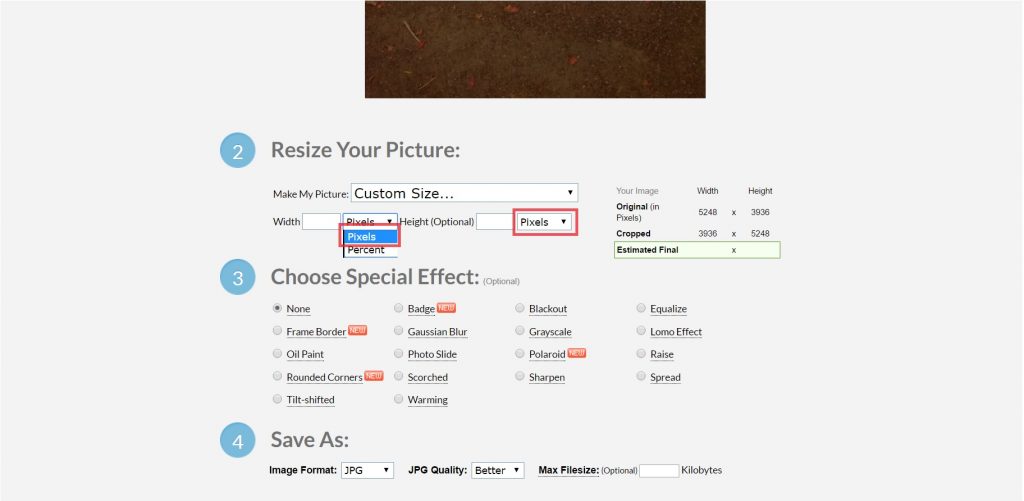
To set the image to a specific size in pixels or by percentage, scroll down and go to “(2) Resize Your Picture” and select the desired option. To resize it by pixels, click on “Custom Size…” in the drop down menu.
Step-8: Choose the unit
Make sure that “Pixels” appears as the unit of choice. If not, then select it from the drop down menu.
Step-9: Enter the dimensions
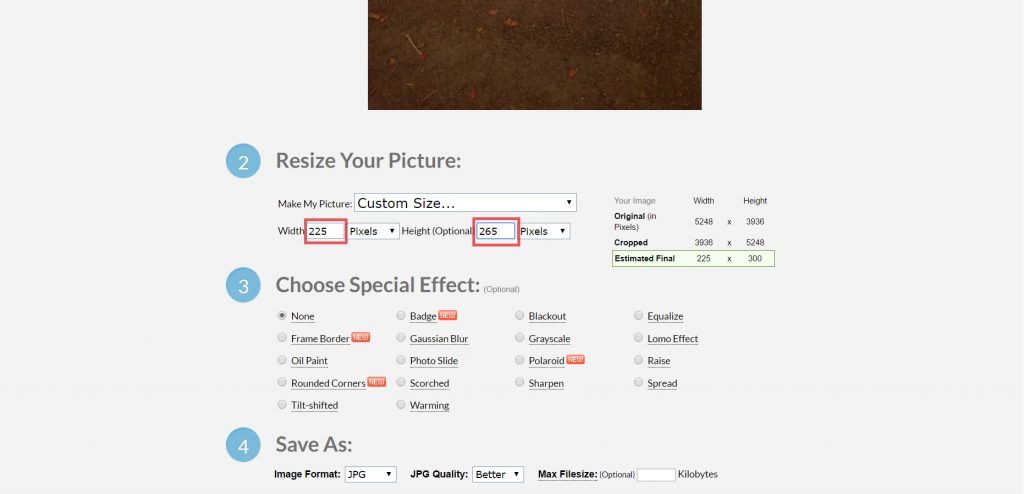
Enter the width and height as required.
Step-10: Fill in the details
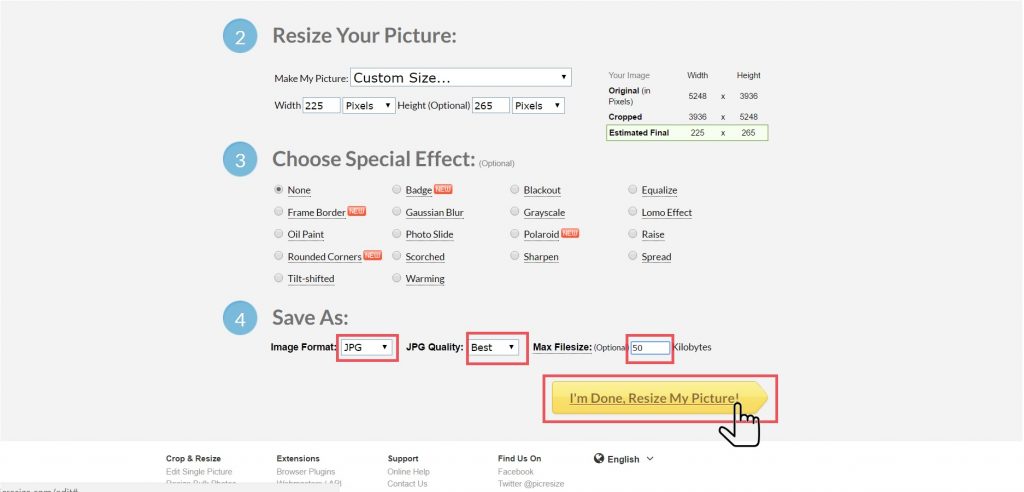
Scroll down to “(4) Save as” and enter the required “Image format“, “JPG Quality” and “MaxFilesize“, and click on “I’m Done, Resize My Picture!“.
Step-11: Preview your edited image
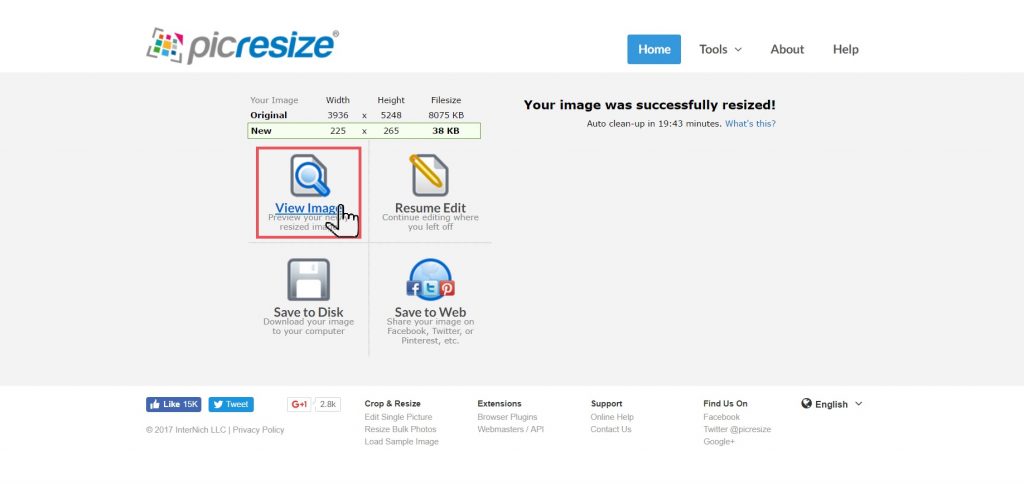
Click on “View Image” to get a preview of your edited picture.
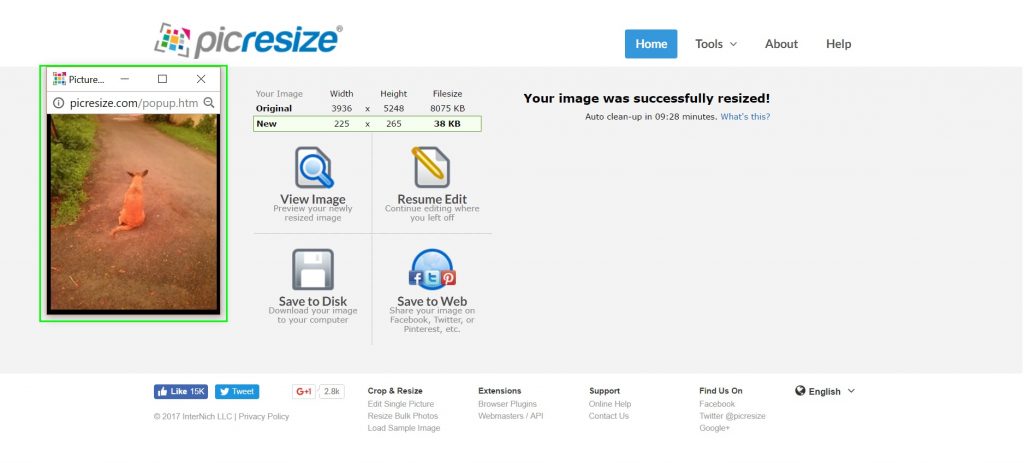
Step-12: Save it and viola! You did it 🙂
If you’re satisfied, go to “Save to Disk” to download the edited resized image and save it to your disk.
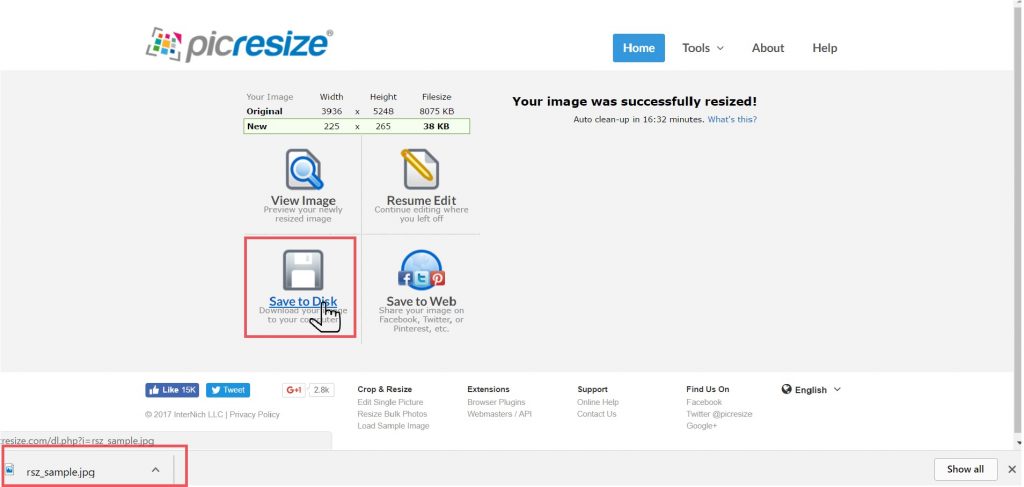
That’s it! Happy editing and happy image resizing 🙂
Leave a Reply